We are so excited about our new DIY Phone Charm Kits! Phone charms are the latest trendy tech accessory, and now we make it easy to create your own!
The video below is a full tutorial on how to use our kits to create your own phone charm. You can also find written instructions and a printable guide below the video. Once your charm is complete, be sure to check out our blog post Attaching a Phone Charm to see how to attach it to your case!
Tutorial Video
Step by Step Instructions
Additional Materials Required
- Sharp scissors
- Multipurpose long lighter – ADULT SUPERVISION REQUIRED!
- Optional: tacky glue
Prepare the string
- Your DIY charm kit comes with a precut length of string with the ends already melted to make it easier to string your beads.
- Examine the string to make sure the ends are still tight and not frayed. If they are becoming frayed, you may want to trim them and carefully melt the ends using a lighter, then lightly twist with your fingers to make a point ADULT SUPERVISION REQUIRED! This preparation will make it easier to string the beads for your charm.
We have two different methods for stringing and beading your phone charm. The first is the most simple and is easy to learn for beginners, while the second is little more complicated but provides a more secure knot. We suggest you watch the video to review both versions before deciding which one you want to use!
Method 1 – Easier
Knot the string
- Fold the string in half and use your thumb and index finger of one hand to hold the two strands together about 2″ from the fold, creating a loop.
- With your other hand, take the top of the loop and wrap it around the two strands, just above where you are holding them together.
- Feed the loop through the circle you have created and carefully pull the knot tight, leaving about a 1.5-2″ loop above the knot.
- Using a lighter, very slowly bring the flame near the knot, but do not touch the string. Allow the flame to lightly melt the knot to secure it. ADULT SUPERVISION REQUIRED! Optional: instead of melting with a flame, you can place a small dot of tacky glue on the knot to secure it. Be sure to let the glue fully dry before continuing with your charm.
String the beads
- You should now have two strings below the loop and knot. You will bead each string separately.
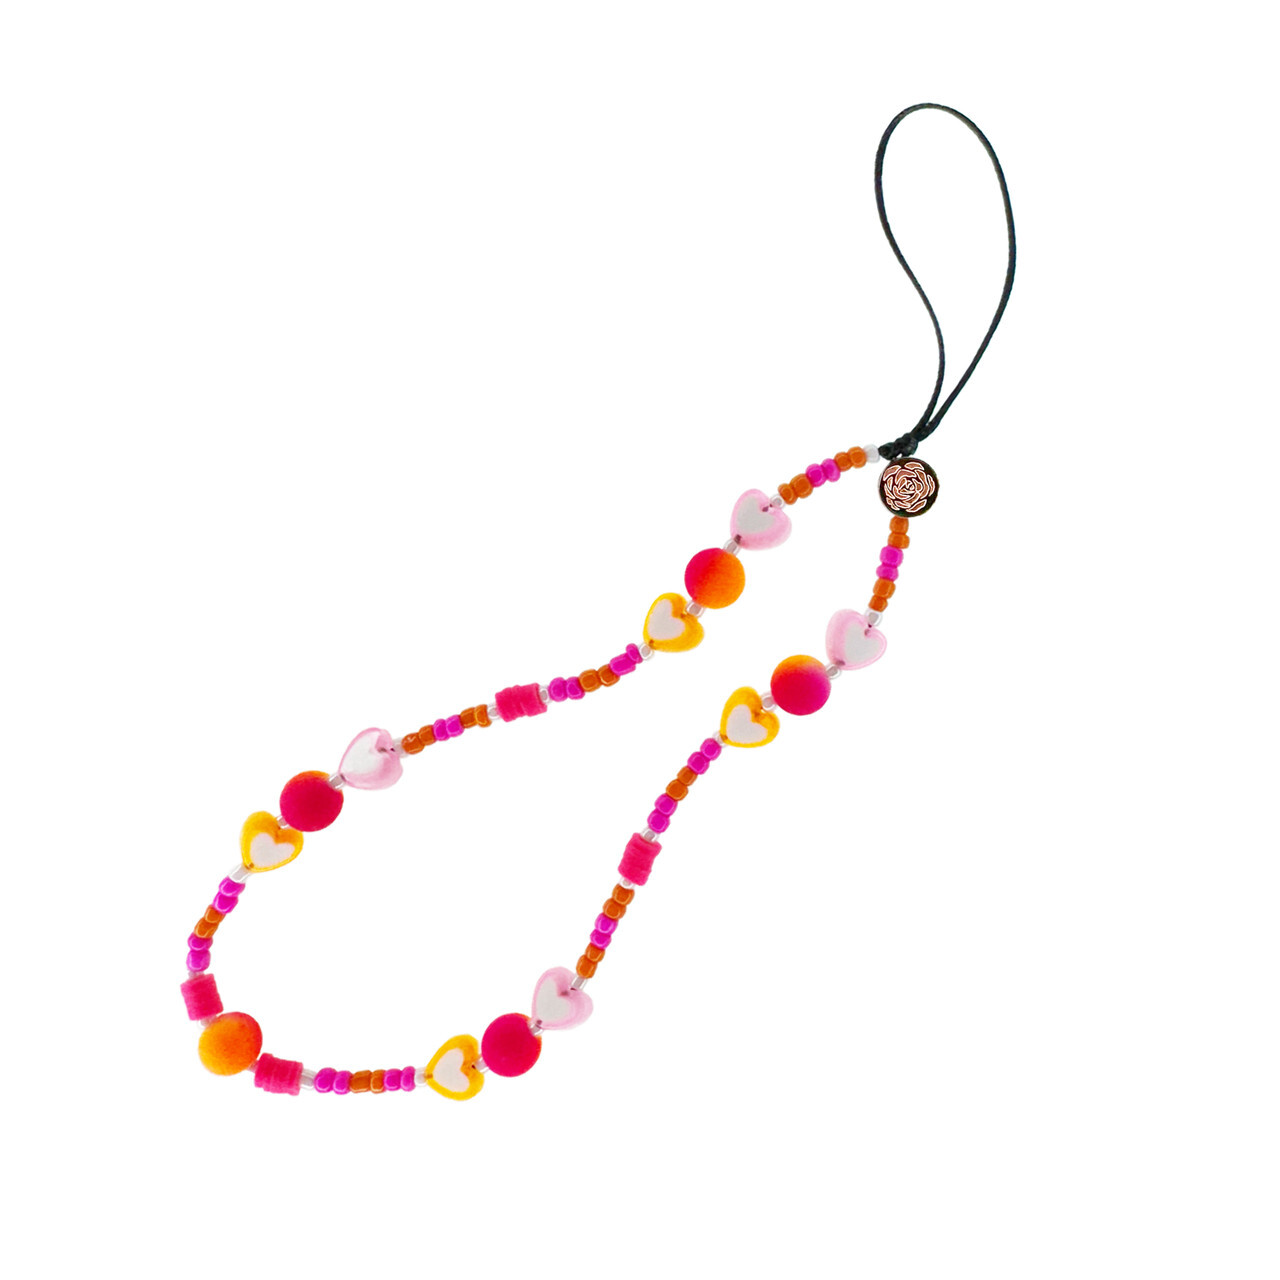
- Each DIY kit comes with a tube including 100 assorted beads for your charm. The average charm uses about 80 beads, but you can add more or less in order to change the overall size of your charm. Generally, you want the charm to easily slip over your wrist.
- Before stringing your beads, decide if you would like to create a specific pattern or a more abstract design. If you want a specific pattern, we suggest laying out the beads on a flat surface to ensure you have them in the correct order before starting. For more abstract designs, you can just string them in a random order.
- String each bead one at a time on one of the strings. Most charms will need about 40 beads on each string, but you can adjust this to make your charm shorter or longer.
- Occasionally the inner hole on a bead might be clogged or too small to easily thread the string through. If this happens, put the bead aside and choose another one. Your kit has extra beads for this possibility.
- When the first string is complete, carefully lay it on the table so that the beads will not come off while you string the second one.
- Repeat the stringing process for the second string.
Finish the string
- When both strings are complete with an equal number of beads, take the end of one string in each hand and then tie them together in a simple knot like you were starting to tie your shoes. Pull the knot together but leave a little slack for the beads to move on each side. Tie the knot again and tighten it securely.
- Trim the ends of both strings close to the knot, being careful to not cut the knot itself.
- Using a lighter, very slowly bring the flame near the knot, but do not touch the string. Allow the flame to lightly melt the knot and both trimmed ends. ADULT SUPERVISION REQUIRED! Optional: instead of melting with a flame, you can place a small dot of tacky glue on the knot to secure it. Be sure to let the glue fully dry before using your charm.
Method 2 – More Advanced
Knot the string
- Lay the string in a straight line, then pick up one end and fold it over about 4-5″ from the end. Pinch the folded string together, about 1.5-2″ down from the fold, between the index and forefinger of one hand.
- Using your other hand, grab the short end of the string and fold it over the longer end and pinch it together with the other string.
- Take the shorter end in your second hand again, pull it underneath the two strings pinched together, then over them and through the loop just created (not the top loop created by the initial fold). Feed the short end around and through the same loop a second time, then pull the string tight.
- You can now adjust the loop size by moving the knot up or down on the long string, then tighten when in place. Your loop should be about 1.5-2″ in length.
- Using a lighter, very slowly bring the flame near the knot, but do not touch the string. Allow the flame to lightly melt the knot to secure it. ADULT SUPERVISION REQUIRED! Optional: instead of melting with a flame, you can place a small dot of tacky glue on the knot to secure it. Be sure to let the glue fully dry before continuing with your charm.
String the beads
- You should now have one long string with a loop and knot at the top. You will be stringing all beads on the single strand.
- Each DIY kit comes with a tube including 100 assorted beads for your charm. The average charm uses about 80 beads, but you can add more or less in order to change the overall size of your charm. Generally, you want the charm to easily slip over your wrist.
- Before stringing your beads, decide if you would like to create a specific pattern or a more abstract design. If you want a specific pattern, we suggest laying out the beads on a flat surface to ensure you have them in the correct order before starting. For more abstract designs, you can just string them in a random order.
- String each bead one at a time on the string. Most charms will use about 80 beads but you can adjust this to make your charm shorter or longer.
- Occasionally the inner hole on a bead might be clogged or too small to easily thread the string through. If this happens, put the bead aside and choose another one. Your kit has extra beads for this possibility.
Finish the string
- When the string is complete with all beads, lay the string on the table with the unfinished end next to the end with the loop.
- Pick up the unfinished end and feed it through the loop end from behind and over the other side of the loop, pulling it through so that the beads are almost to the loop on both sides, then use one hand to pinch together the loop and the string.
- Now take the unfinished end behind the pinched loop and around and through the loop that was just created (not the loop at the end of the string). Feed the short end around and through the same loop a second time, then pull the string tight.
- then back around through the loop two more times.
- Slide the new knot up close to the original loop and pull on the string end to remove most of the excess space between the beads. This will require a little bit of adjustment!
- Trim the end of the string close to the knot, being careful to not cut the knot itself.
- Using a lighter, very slowly bring the flame near the knot, but do not touch the string. Allow the flame to lightly melt the knot and the cut end. ADULT SUPERVISION REQUIRED! Be very careful not to get the flame too close or you could accidentally burn through the loop and break the charm. Optional: instead of melting with a flame, you can place a small dot of tacky glue on the knot to secure it. Be sure to let the glue fully dry before using your charm.
Show us your charms!
We would love to see your charms! If you post to social media, be sure to tag @abbyrosecases so we can see how it turned out!